The Industry’s Most Powerful 5G and 4G LTE Cell Signal Booster
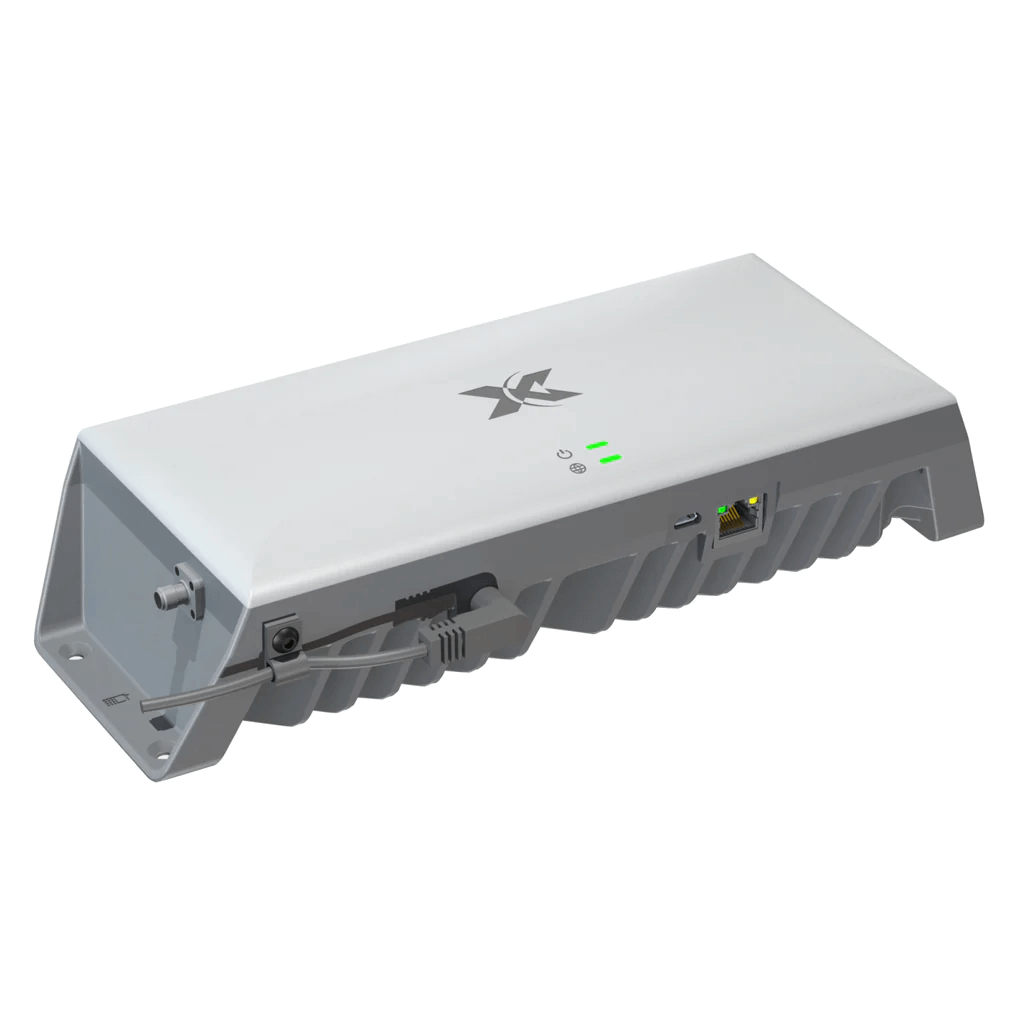
The Cel-Fi GO G41 FN ensures reliable 4G and 5G connectivity for critical communication inside small business buildings. With single-carrier capabilities, it offers 100 dB gain and up to 20,000 sq ft of coverage, making it the most powerful in-building FirstNet cell phone booster in its class.


Your Best Chance at Better Cell Signal – Period
If you struggle with weak cell signal, the CEL-FI GO G41 FN is your best shot at solving them. If you’re rural, isolated, or have a metal building, the GO G41 FN will make the most of whatever signal exists, no matter how weak it seems.
If the CEL-FI GO G41 FN doesn’t give you noticeably improved cellular performance, nothing will.
Unmatched Versatility and Configuration Options
The unmatched power of the CEL-FI GO G41 FN makes it ideal for expansion and upgrades. Choose to upgrade your coverage area even further with the addition of the Bolton Long Ranger parabolic outdoor cellular antenna or Bolton Arrow LPDA outdoor cellular antenna.
The Long Ranger parabolic grid antenna provides up to +28dBi of gain in the right conditions and the Bolton Arrow LPDA antenna can boost signal up to +12 dBi. Even if your existing signal is extremely weak, these custom antenna options will produce impressive results.


Expanded Indoor Antenna Options for Any Scenario
With its power, the CEL-FI GO G41 FN gives exceptional indoor coverage. Choose to concentrate its maximum gain of 100dB on a single indoor antenna or spread it among up to four. Utilize directional panel antennas or omni-directional dome antennas depending on your layout. With the CEL-FI G41, it’s all up to you.
We’re happy to help with any specific questions. Simply give us a call at 1-888-427-1136 for a free consultation or ask your question in the chat. One of our representatives will be with you shortly.
Carrier Switching and Remote Monitoring with the CEL-FI WAVE App
The CEL-FI WAVE App is Nextivity’s proprietary application for all CEL-FI products. It connects over Bluetooth to the CEL-FI GO G41 FN and allows for easy registration, fine-tuning, troubleshooting, and remote monitoring for the system.
You can select the carrier you need in the CEL-FI WAVE app settings. Choose from Verizon, AT&T, T-Mobile or US Cellular, and switch between them at any time. It also provides readings such as signal strength (RSRP) gain, and signal quality (SINR).
The WAVE app is compatible with any iOS or Android device.

| Nextivity CEL-FI GO G41 Bands | |||||
|---|---|---|---|---|---|
| Bands | Downlink (MHz) | Uplink (MHz) | Uplink Power (dBm) | ||
| 2 | 1930-1990 | 1850-1910 | 20 | ||
| 4 | 2110-2155 | 1710-1755 | 20 | ||
| 5 | 869-894 | 824-849 | 15 | ||
| 12 | 729-746 | 699-716 | 10 | ||
| 13 | 746-756 | 777-787 | 10 | ||
| 25 | 1930-1995 | 1850-1915 | 20 | ||
| Nextivity CEL-FI GO G41 FN Specs | |
|---|---|
| Network Protocols | LTE/DSS/NR* |
| Antenna Technology | SISO |
| Network Selection | Automatically best available (WAVE Portal for manual setting) |
| Duplex Modes | FDD |
| # of Relay Bands | 2 |
| Relay Bandwidth | 20 + 20 MHz max. |
| Output Downlink Power (All Bands) | 16 dBm max. | Output Uplink Power (Bands 2/4/25) | 22 dBm max. |
| Output Uplink Power (Bands 5/12/13) | 20 dBm max. |
| System Gain | 100 dB max. |
| Enterprise-Grade Echo Cancellation | 30 dB min. |
| Return Loss | -8 dB |
| Nextivity CEL-FI GO G41 FN Coverage Unit Specs | |
| Donor RF Connector | SMA (f) |
| Server RF Connector | SMA (f) |
| DC Input | 5.5 x 2.5 mm (f) Barrel |
| Status LED (Power) | Bi-color LED (Green/Red) |
| LAN Status | LED (Green) |
| Factory Debug Only | 3x USB 2.0 Micro-B |
| System Management & SW Updates |
WAVE App for iOS 11.0 or later WAVE App for Android WAVE Portal for Desktop |
| Nextivity CEL-FI GO G41 FN Compliance | |
| 3GPP |
TS 25.143 Rel 13 3GPP TS 36.143 Rel 13 |
| FCC | Part 15, Part 20, Part 22, Part 24, Part 27, Part 90 |
| RoHS3 | EN 63000: 2018 |
| UL | Yes |
| Bluetooth | LE Ver 4.2 |
| Nextivity CEL-FI GO G41 FN Power Supply | |
| Power Consumption | 30 W max. |
| Power Supply Plug | Type A (US) |
| Power Supply AC Cable | 18 AWG |
| Power Cable Length | 6 ft (1.85 m) | Environmental |
| Operating Temperature | 32 to 104 °F (0 to 40 °C) |
| Storage Temperature | -31 to 158 °F (-35 to 70 °C) |
| Heat Dissipation | Passive Convection |
| Surface Temperature | 111°F (44 °C) max. at ambient |
| Non-condensing Humidity | 0 to 95% |
| Ingress Protection Rating | IPX0 Indoor Only |
| Mechanical | |
| Main Unit Dimensions | 17.4 x 12.3 x 3.8 in (441 x 312 x 97 mm) |
| Main Unit Weight | 15.4 lb (7.0 kg) |
Installing any consumer signal booster setup is fairly simple, but can be a pain. The results, however, are worth it.
You’ll need some general handyman skills but nothing too specialized. If you prefer having someone else do the job, you can also contact your local general contractor, electrician, or anyone who's installed a satellite TV dish.
-
1. Find The Best Outside Signal:
Begin by finding the best signal outside your building. This is done by walking around the perimeter of your building and either using the number of bars on your phone (ok method), smartphone apps (good method), or Field Test Mode (great method) to find the best location. Pro tip: Locating the side of your building getting the best signal is the MOST CRUCIAL step of the installation process. -
2. Install Outside Antenna
The area with the best signal is where you will mount the outside antenna. Place the antenna as high up as possible, ideally on the roof, although the fascia or gable is acceptable. It's important that the outside antenna should be on or near the edge of the roof pointing away from the building to the cell tower and NOT pointing across the roof since it may cause interference with the inside antenna. Point the outside antenna at your nearest cell tower. -
3. Connect to Amplifier
Once the outside antenna is mounted, connect the included coaxial cable to the outside antenna and to the "outside antenna" port on the amplifier. Pro tip: The amplifier does all the heavy lifting for boosting signal and will get warm. Keep it in a well-ventilated area. -
4. Install Inside Antenna
Once the cable is connected to the "Outside Antenna" port of the amplifier, do the same for the "Inside Antenna" port. Some prefer having the antenna mounted on the ceiling, others prefer the wall. Again, it's all a matter of preference, and use case. If you have a panel antenna, they generally perform best on the wall, and if you have a dome antenna, they usually perform best on the ceiling. If you have multiple antennas, you will need to use a splitter to divide the cable runs, and then place each antenna where you'd like them. Pro tip: Having enough separation between the two antennas prevents oscillation. Make sure there is at least 20 feet vertical or 50 feet horizontal distance between the two. -
5. Power on
Plug in the power supply to the Amplifier and to the wall outlet. The amplifier will sync up and if you see all green lights, then green means GO! Check to see near the inside antenna how much better signal you're getting. Pro tip: Any post-installation adjustments like relocating the outside antenna will require rebooting the amplifier. Simply unplug the power supply for 5-10 seconds and replug to reboot the system. -
Technical Support & Troubleshooting
If you need help setting up your amplifier system and troubleshooting support: our trained product specialists can assist. Just call us at 1-888-427-1136 or email sales@signalboosters.com
Frequently Asked Questions
Setting up the CEL-FI GO G41 FN can be broken down into two sections: physical installation, and activation via the WAVE app.
Installation steps will vary depending on the antenna package you purchase.
- Attach SMA to N-F Connectors to each booster output.
- Connect 2ft jumper cable to the connector on the Antenna side, and attach the surge protector to it.
- Run 30 ft of cable to where you plan to set up your outside antenna, attaching the yagi antenna to the 30ft cable.
For Single Indoor Antenna Setups
- Run 30ft of cable to where you plan to set up your indoor antenna. Attach panel or dome antenna.
For Single Indoor Antenna Setups
- Connect the second 2ft jumper cable to the connector on the Phone side, and attach to the single-port side of the splitter.
- Attach 30ft cables to the Multi-Out side of the splitter. Run them to where you plan to set up your indoor antennas.
- Attach the panel or dome antenna to the end of the 30ft cable to complete the set up.
Using the App
Now that you’ve physically set up the GO G41 FN, you’ll need to activate it with the CEL-FI WAVE app.
- Register your booster. This is a legal step and will tie your app to your booster.
- Choose which carrier to boost. The CEL-FI GO G41 FN works with all major North American carriers. Enjoy your boosted signal!
The app has many other features, allowing for remote monitoring, optimal antenna setup, and more – however, these features are all optional.
Please call us at 1-888-427-1136 for a free consultation and answers to any other questions you might have.
Yes! It boosts 5G on several wavelengths.
We offer numerous customization options for the GO G41 FN, all of which have different use cases. This question can be best answered by answering several smaller questions.
This is the most difficult antenna to install, but it provides by far the highest gain and has up to 20 miles of range. Buy this if you have extremely weak signal outdoors.
The Arrow LPDAThe Arrow functions a bit like a TV antenna you’d put on your roof. It sits at the midpoint between the Long Ranger and a typical Yagi. We recommend the Arrow as an upgrade in most scenarios due to how familiar people are with pointing and installing them. It provides up to +11 dB gain and can reach up to 10 miles, so this works in most scenarios.
Yagi Directional AntennaThe humble yagi is small, has a wide range, and is easy to install. This is the default antenna which comes with the CEL-FI GO G41 FN , and it works well, providing up to +8dB of gain and up to 5 miles of range.
Omnidirectional AntennaThe easiest antenna to install, the omnidirectional provides the smallest amount of gain. We rarely recommend this with the GO G41 FN, as the G41 only boosts a single carrier at a time, and an omnidirectional antenna’s most useful quality is its ability to draw in the signal from numerous carriers at once. However, if you live near a cell tower with strong outdoor signal, it will work just fine.
Up to 20,000 sq ft coverage is possible in an open area by utilizing 4 indoor antennas. In a typical home or office environment, up to around 8,000 sq ft coverage is possible from a kit with four antennas.
As a rule of thumb, we recommend installing one antenna for every 750 sq ft to 1000 sq ft of space in a typical home or office environment subdivided into smaller spaces. If the environment is more open, install one antenna for every 1,500 to 2,000 sq ft.
There are two types of indoor antenna, the panel and the dome. So which to buy?
Panel Antennas :direct signal in the direction they are pointing. They can be installed on a wall, or a very high ceiling.
Dome Antennas :spread signal in all directions. They are best for lower ceilings or wide open spaces.
Buy the type of antenna suitable for the area you need to cover.
There are two pieces of information to keep in mind when talking about cable runs.
First, the shorter the better. If you can get away with a shorter run, do it. We never recommend cable runs of longer than 100 ft with the included RG6 cable. Should you have need of a longer run, upgrade your cable.
Second, bear in mind separation between antennas. In order for your system to work as well as it can, you’ll want around 20 ft of vertical or 50 ft of horizontal separation between your indoor and outdoor antennas. This is a caveat to the above point: your cable runs should always be longer than 20 ft vertically or 50 ft horizontally between both antennas.
Using the CEL-FI WAVE app, you can choose which carrier to use. The GO-X only boosts signal for one carrier at a time.
Please call us at 1-888-427-1136 for a free consultation and answers to any other questions you might have.
For a basic setup of the CEL-FI GO G41 FN, use of the WAVE app is required. Once the booster is registered and the carrier chosen, you no longer need the app if you do not want to take advantage of its enhanced features.
First, the shorter the better. If you can get away with a shorter run, do it. We never recommend cable runs of longer than 100 ft with the included RG6 cable. Should you have need of a longer run, upgrade your cable.
Second, bear in mind separation between antennas. In order for your system to work as well as it can, you’ll want around 20 ft of vertical or 50 ft of horizontal separation between your indoor and outdoor antennas. This is a caveat to the above point: your cable runs should always be longer than 20 ft vertically or 50 ft horizontally between both antennas.
The length of cable runs will vary depending on the type of cable used. The 400-grade cable included in our kits are pre-cut to 30 feet, but such cable can realistically go to around 100 feet if you’re running only one antenna.
For a little more information: 400-grade cable gives around .45 dB of loss in the 800 MHz range and .7 dB of loss in the 1900 MHz range per 10 feet. As a general rule, the more you split the signal, the shorter you’ll want the cable run. If you have 4 antennas, try to keep the individual cable runs to shorter than 60 feet at absolute maximum – the shorter, the better.
We provide a 30 day money back guarantee and a two-year warranty on all CEL-FI GO G41 FN units.
Please call us at 1-888-427-1136 for a free consultation and answers to any other questions you might have.


