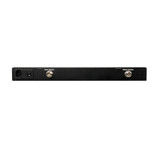
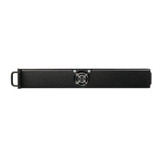
The WilsonPro 1000R is the most popular commercial cell phone signal booster in USA & Canada. That's because Wilson Electronics has been solving weak RF signal problems for over 25 years.
With up to +70 dB gain of amplification, it greatly enhances 4G LTE cell service for all your wireless devices (smartphones, notebooks, hotspots, etc.) on any carrier for buildings and offices up to 35,000 sq ft. Rack-mount version for IT rack stands & enclosures. For the wall-mount version, please see the Wilson Pro 1000.
Never drop a call again. Stop waiting for loading screens. No more searching for reception. Get faster internet & updates on your apps. Send emails and text messages with zero delay. Stream video & audio with little to no buffering.
More bars instantly from Wilson Pro, the leading enterprise cellular signal booster name in the business.
- Boosts 4G LTE for any building or office up to 35,000 sq ft.
- Works for all phones & cellular devices, all US & Canadian carriers.
- Rack-mount form for IT server racks
- Complete kit: all parts included. Expansion kits available for future proofing.
- No monthly fees, no need to be connected to wifi, it just works.
- Wilson Pro 1000R Booster
- Outside Directional Antenna
- 100 ft Wilson400 Cable
- 2 ft Wilson400 Cable
- Inside Dome Antenna
- 75 ft Wilson400 Cable
- 50 Ohm Lightning Surge Protector
| Wilson Pro 1000R | |
|---|---|
| SKU | 460237 |
| FREQUENCIES |
Band 12 - 700 MHz Band 13 - 700 MHz Band 5 - 850 MHz Band 4 - 1700/2100 MHz Band 25/2 - 1900 MHz |
| MAX GAIN | 70 dB |
| IMPEDANCE | 50 Ohm |
| POWER | 110 - 240 V AC, 50 - 60 Hz, 30 W |
| CONNECTORS | N-Female |
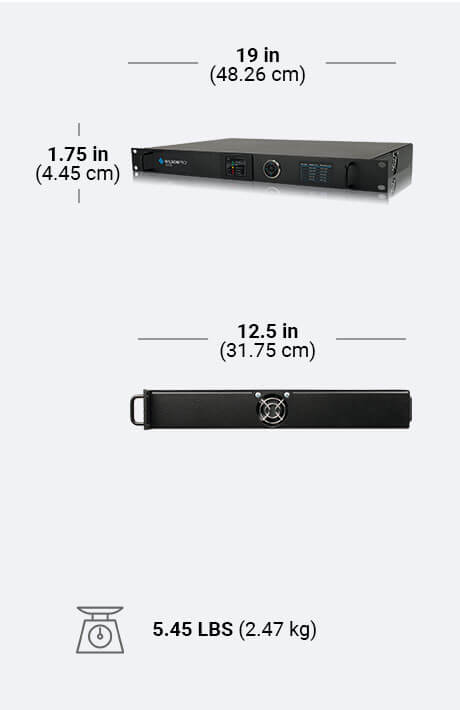
| DIMENSIONS | 3.75 x 11.5 x 18 in • 1.75 x 19 x 12.5 in |
| WEIGHT | 15.405 lbs • 5.45 lbs |
| Max Uplink Power | 26.0 dBm |
| UPC | 811815026884 |
| FCC NOTICE | This is a CONSUMER device. BEFORE USE, you MUST REGISTER THIS DEVICE with your wireless provider and have your provider's consent. Most wireless providers consent to the use of signal boosters. Some providers may not consent to the use of this device on their network. If you are unsure, contact your provider. You MUST operate this device with approved antennas and cables as specified by the manufacturer. Antennas MUST be installed at least 20 cm (8 inches) from any person. You MUST cease operating this device immediately if requested by FCC or a licensed wireless service provider. |
| WARNING: California's Proposition 65 | This product can expose you to chemicals including Nickel (Metallic) which is known to the State of California to cause cancer and Bisphenol A (BPA) which is known to the State of California to cause birth defects or other reproductive harm. For more information go to https://www.p65warnings.ca.gov/. |
Installing any consumer signal booster setup is fairly simple, but can be a pain. The results, however, are worth it.
You’ll need some general handyman skills but nothing too specialized. If you prefer having someone else do the job, you can also contact your local general contractor, electrician, or anyone who's installed a satellite TV dish.
-
1. Find The Best Outside Signal:
Begin by finding the best signal outside your building. This is done by walking around the perimeter of your building and either using the number of bars on your phone (ok method), smartphone apps (good method), or Field Test Mode (great method) to find the best location. Pro tip: Locating the side of your building getting the best signal is the MOST CRUCIAL step of the installation process. -
2. Install Outside Antenna
The area with the best signal is where you will mount the outside antenna. Place the antenna as high up as possible, ideally on the roof, although the fascia or gable is acceptable. It's important that the outside antenna should be on or near the edge of the roof pointing away from the house to the cell tower and NOT pointing across the roof since it may cause interference with the inside antenna. Point the outside antenna at your nearest cell tower. -
3. Connect to Amplifier
Once the outside antenna is mounted, connect the included coaxial cable to the outside antenna and to the "outside antenna" port on the amplifier. Some run cable into the attic, others prefer using the window-entry cable. It's all a matter of preference and aesthetics and where you want to locate the amplifier. Pro tip: The amplifier does all the heavy lifting for boosting signal and will get warm. Keep it in a well-ventilated area. -
4. Install Inside Antenna
Once the cable is connected to the "Outside Antenna" port of the amplifier, do the same for the "Inside Antenna" port. Some prefer having the antenna mounted on the ceiling, others prefer the wall. Again, it's all a matter of preference, and use case. If you have a panel antenna, they generally perform best on the wall, and if you have a dome antenna, they usually perform best on the ceiling. If you have multiple antennas, you will need to use a splitter to divide the cable runs, and then place each antenna where you'd like them. Pro tip: Having enough separation between the two antennas prevents oscillation. Make sure there is at least 20 feet vertical or 50 feet horizontal distance between the two. -
5. Power on
Plug in the power supply to the Amplifier and to the wall outlet. The amplifier will sync up and if you see all green lights, then green means GO! Check to see near the inside antenna how much better signal you're getting. Pro tip: Any post-installation adjustments like relocating the outside antenna will require rebooting the amplifier. Simply unplug the power supply for 5-10 seconds and replug to reboot the system. -
Technical Support & Troubleshooting
If you need help setting up your amplifier system and troubleshooting support: our trained product specialists can assist. Just call us at 1-800-470-6777 or email sales@signalboosters.com


